Instructions for using Micro.blog VS Code extension (alpha)
Creating a Micro.blog Post with Images
This is an instructional post for using this Micro.blog VS Code extension. It’s in alpha, so the documentation will evolve over time.
First you need to install the plugin, the best way to use it is to get the code from the repo and run just dev in the repo.
🔧 Configuration
- Get your app token: Go to micro.blog → Account → Edit Apps → New Token
- Configure extension:
- Command Palette (Cmd+Shift+P) → “Micro.blog: Configure”
- Enter your app token
- Extension auto-discovers your blog domain
Creating a New Draft
First, locate the micro.blog plugin section in your VS Code sidebar, I expect it to be under the timeline view in the main Explorer sidebar. You’ll see the plugin interface with several action buttons:

To create a new blog post, click the plus (+) button in the plugin toolbar. This will open the title input dialog.
After clicking the plus button, you’ll see a title input dialog where you can enter your post title:

Simply type your post title and press Enter to create the draft file.
Writing Your Blog Post
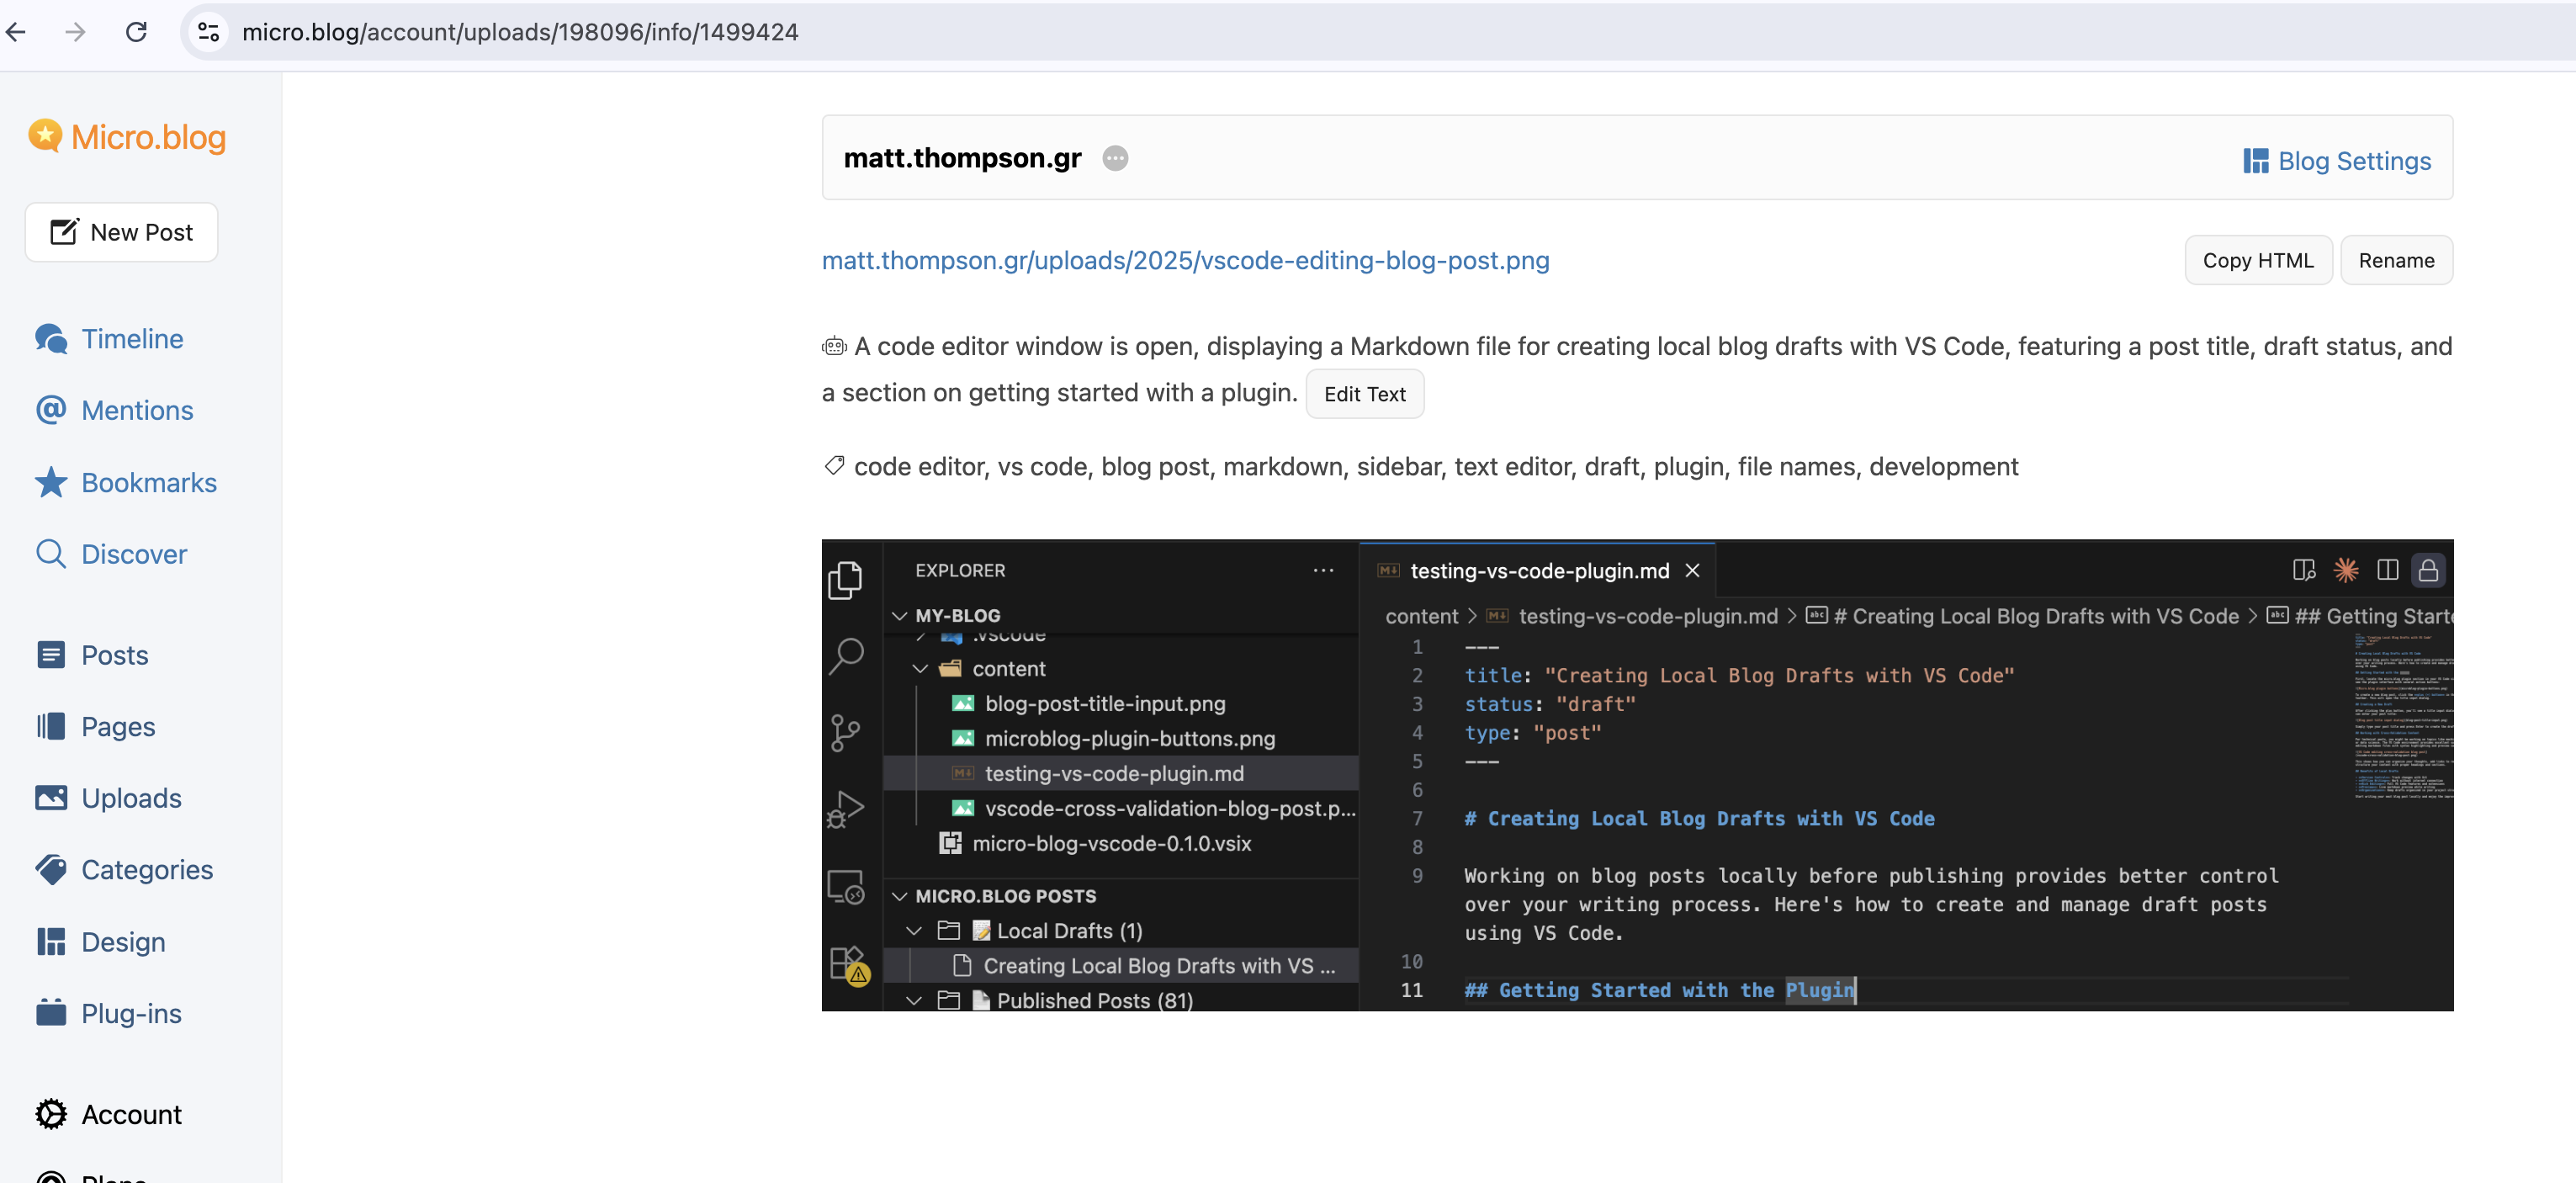
Once you’ve created your draft, VS Code provides an excellent environment for writing with syntax highlighting, file organization, and all your favorite extensions:

This shows your new blog post open in the editor with the micro.blog plugin visible in the sidebar, displaying your local drafts. You can see the post content, frontmatter, and how everything is organized within your project structure.
Uploading Images
The VS Code plugin also makes it easy to upload images directly to your Micro.blog account. This is particularly useful when you want to include images in your blog posts.
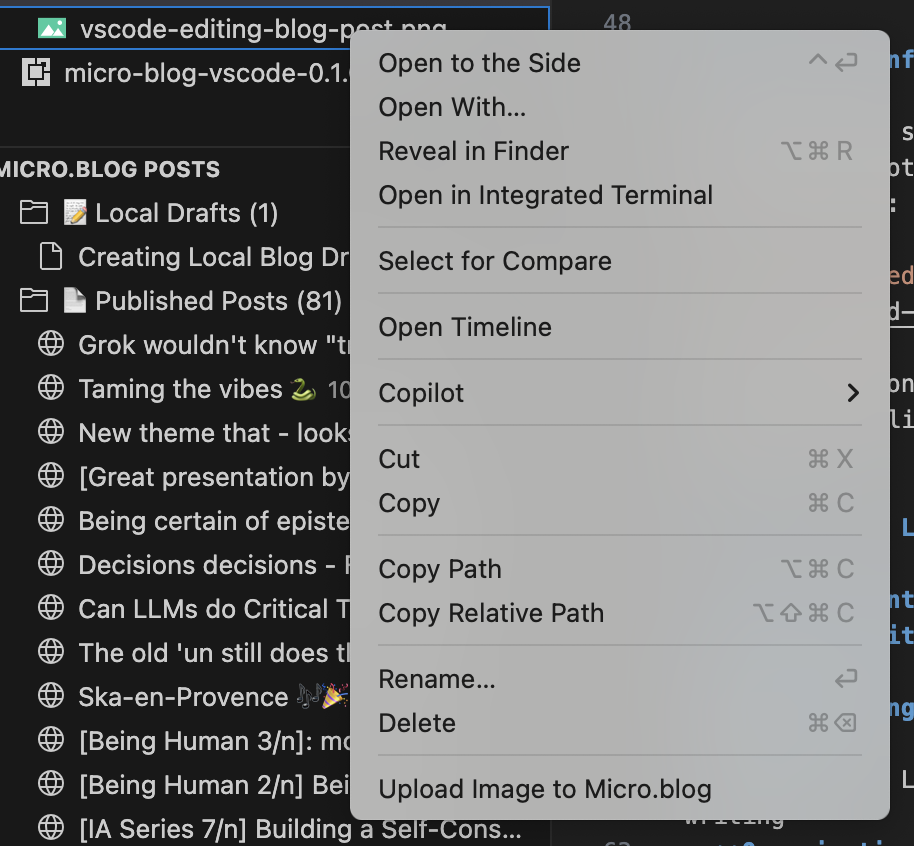
Step 1: Right-Click to Upload
To upload an image, right-click on any image file in your VS Code file explorer and select “Upload Image to Micro.blog” from the context menu:
Step 2: Upload Success
Once the upload is complete, you’ll receive a success notification with options to copy the URL or markdown for the uploaded image:
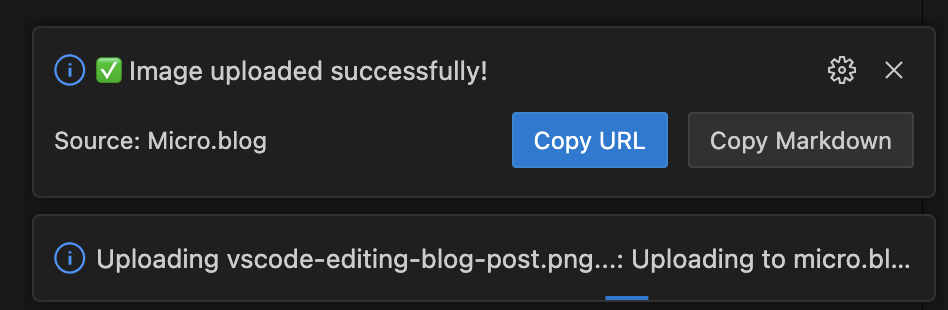
The notification provides two convenient options:
- Copy URL: Get the direct link to your uploaded image
- Copy Markdown: Get the markdown syntax ready to paste into your blog post
Step 3: Check Uploads Locally
After uploading images, you can view them in the VS Code sidebar under the “Remote Uploads” section. The plugin shows all your uploaded files with convenient context menu options:
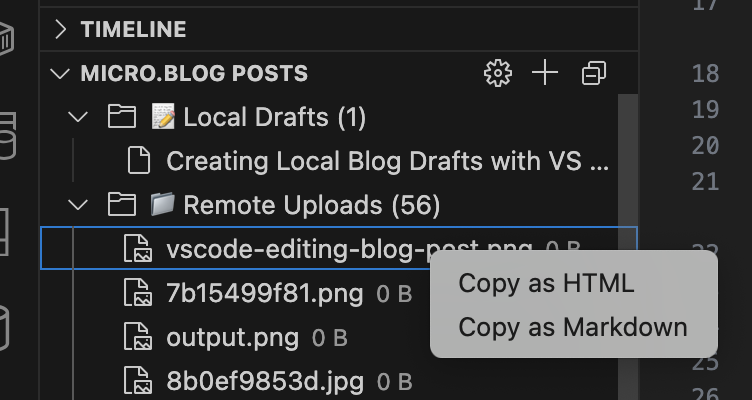
Right-click on any uploaded file to access quick copy options:
- Copy as HTML: Get the HTML
<img>tag for your image - Copy as Markdown: Get the markdown syntax
ready to paste
This makes it easy to reference your uploaded images in your blog posts without leaving VS Code.
Step 4: View in Micro.blog
You can also view your uploaded images in the Micro.blog web interface. The plugin integrates seamlessly with your account, and you can see all your uploads organized in your media library:
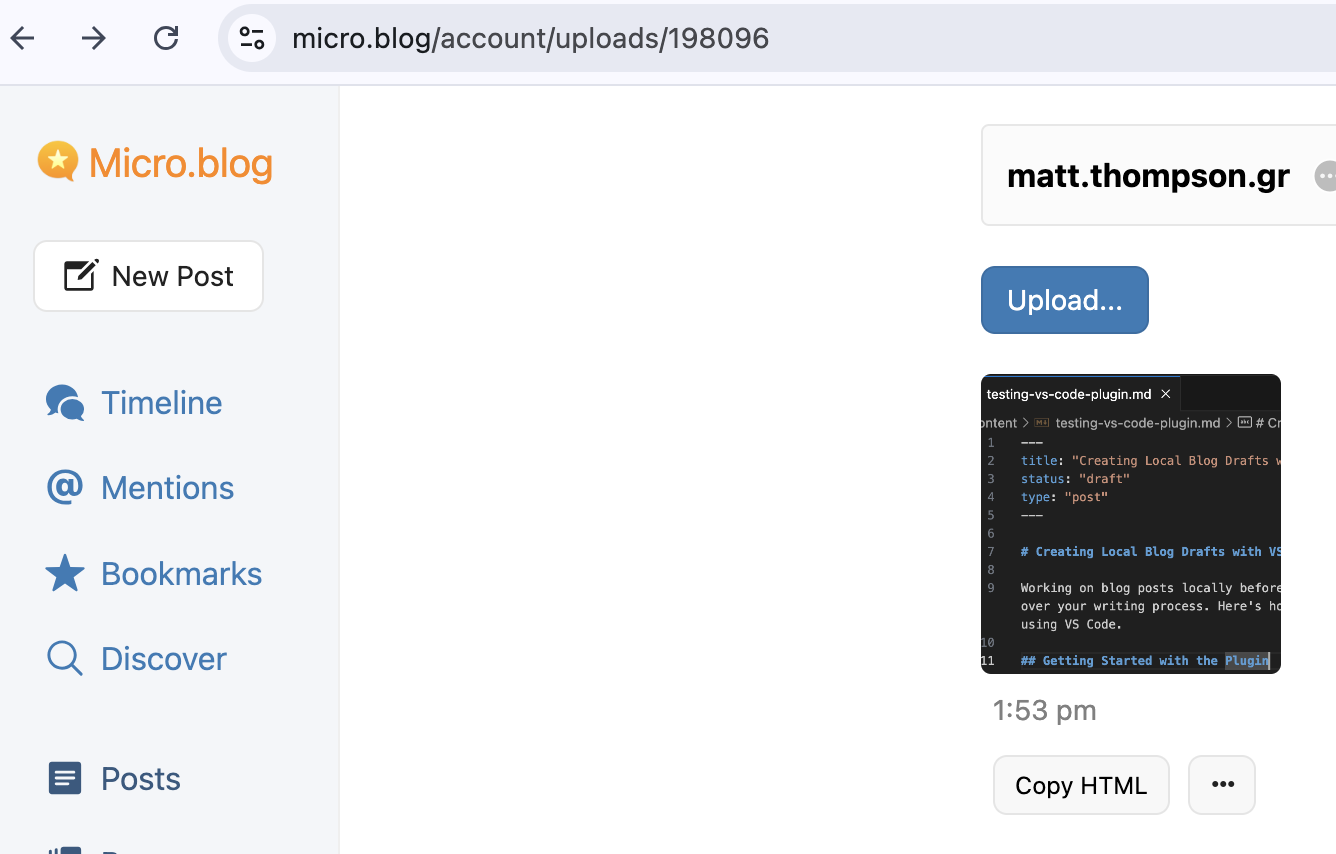
Each uploaded image gets its own detail page where you can view metadata, copy URLs, and manage your media:
Publishing Your Draft
When you’re ready to publish your draft, follow these three simple steps:
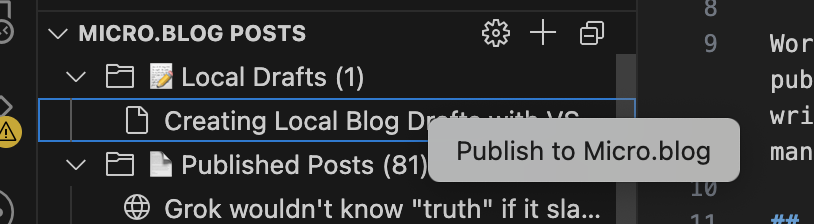
Step 1: Access the Publish Dialog
Right-click on your draft in the micro.blog plugin sidebar and select “Publish to Micro.blog” from the context menu:
Step 2: Review and Confirm
The plugin will show you a preview of your post before publishing. Review the content and click “Publish” to send it to your blog.
Step 3: Confirmation
Once published successfully, you’ll receive a confirmation notification with the URL of your published post:
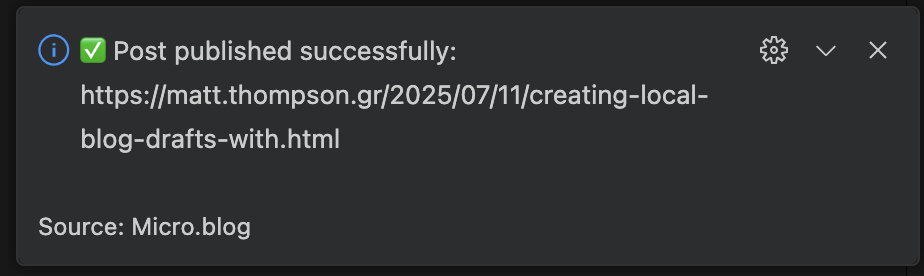
The notification will show the direct link to your newly published blog post on your micro.blog site.
Benefits of Local Drafts
- Version Control: Track changes with Git
- Offline Writing: Work without internet connection
- Rich Editing: Full VS Code features and extensions
- Preview: Live markdown preview while writing
- Organization: Keep drafts organized in your project structure
- Image Management: Upload and manage images directly from VS Code
Start writing your next blog post locally and enjoy the improved workflow!